
With only two or three measurements, you can quickly and precisely calculate the area of a ceiling, floor or wall, or the volume of a room. No need to note down the individual values! The result is calculated automatically and shown on the display.

With only two or three measurements, you can quickly and precisely calculate the area of a ceiling, floor or wall, or the volume of a room. No need to note down the individual values! The result is calculated automatically and shown on the display.

The maximum measurement is very helpful, e.g. for finding out the room diagonal. The minimum measurement can be used to measure at right angles to a wall.
Yes, in the “Settings” you can go to the “Offset Icon” and enter a value that will constantly be added / subtracted from your measured distance value. If an offset value is entered you will see the adequate symbol - a triangle with plus or respectively minus next to the laser symbol.
If you want to set the offset value back to zero, enter the setting “Offset” and reset it.
It is the parallax effect due to the distance between the laser window and the digital Pointfinder optics. This effect occurs only when the digital Pointfinder is used on targets below 10 m.
In this case the laser dot appears displaced in reference to the crosshair. This is not an error!
For distances below 10 m please rely on the real laser dot.
D5 & D8
On the screen of the Digital Pointfinder on top of the crosshair you see a symbol existing of a “Sun” and a “+” and “-“. By pressing the “Plus” and “Minus” key you are able to adjust the brightness in 5 steps.
E7500i & D810
When turning the Digital Pointfinder on it is indicated in the display that you can change the brightness with the left and right arrow keys on the keypad.
Disto models with integrated digital Pointfinder in the device has 1x, 2x and 4x zoom.
D5 & D8
You can see on the left up corner which zoom level you have selected. To change from one zoom level to the next one you have to press the “Digital Pointfinder” key.
E7500i
You can see in the middle of the status bar of the screen, which zoom level you have selected. To change from one zoom level to the next one you have to press the “up/down arrow keys”.
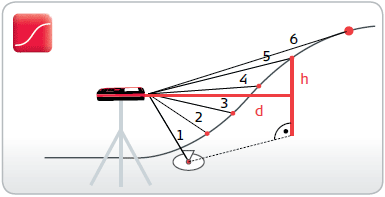
Target the device on a known reference mark and then measure the height differences of other points relative to this. If the measured points are taken all in one direction the profile of the ground can be determined from the measured horizontal distances and the height differences.